Your Cart is Empty
Luggage
Apparel
events
The Mosko Blog
Beth and Jack: Welcome Aboard!
March 30, 2022
Beth and Jack: Welcome Aboard!
October 27, 2020
I can’t believe it’s been over two months since the last post! I would’ve thought with COVID happening and all major events cancelled, this would be a slow summer with lots of time for writing and posting. Instead it’s been action packed.
First I want to welcome Beth Chase and Jack Hewitt to the Mosko team.
Beth joined us from DaKine, where she spent 6 years as the Sales and Merchandise Manager, managing DaKine’s inventory planning and purchasing processes. Prior to that she was a demand planner at Columbia Sportswear and Chris King Precision Components (a manufacturer of cycling parts). Beth will take over Mosko’s operations and purchasing functions from Lee, who will transition into the design department as our principal engineer. Beth rides a Kawasaki Versys 300 setup for long distance touring, and a KLX250 for local dualsport rides. Welcome aboard Beth!!


Jack joined Mosko from the snowboard accessory company Airblaster, where he spent five years as Marketing Manager, helping Airblaster achieve growth and recognition as an authentic and meaningful brand, while competing with much larger rivals in the snowboard industry. Before Airblaster, Jack worked in the marketing department at Snow Peak – best known for its ultralight titanium cookware – and as a merchandiser at The Clymb. He currently rides a KTM690 enduro. Welcome aboard Jack!!
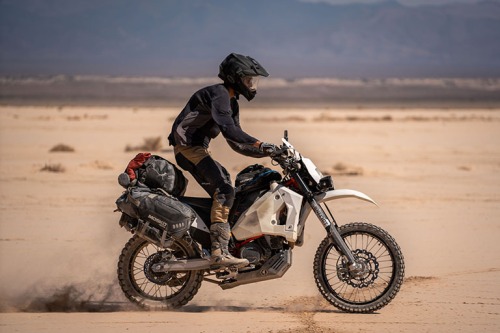

I’m so stoked with our team right now. Jack and Beth: thanks for joining us!
The Wildcat Backpack
Andrew has been spending lots of time on the Wildcat, and we’ve been having lots of fun testing it this summer. We’re on a new round of prototypes, which three of us took on the Death Valley ride a few weeks ago.

The optional chest rig is handy. I’ve been using it for snacks, Inreach, phone, and leatherman. In its current configuration, it pulls the backpack straps a little too close, making for an awkward fit around the neck, but that’s something we can easily fix.


Having up to 3L of water storage is really handy. For day rides, 3L is more than enough. For camping off a smaller DS bike, with 3L in the pack and another 2L in my tank bag (the Gnome), I can carry 5L of water, none of it on the back of the bike. Which is great because water is the heaviest things we carry on a multi-day desert trip, where filtering usually isn’t an option.

The expandable beavertail is also great. I used it for all sorts of things, like last minute groceries, body armor, and holding 1.5L or fuel for long stretches.


There are still some sizing/fitment challenges to be solved, and also we haven’t designed the internal organization yet. Plus Andrew has a cool idea for adding a removable waist belt with pockets, so that’s something we’ll play around with in the next version. We’re taking our time on this, we really want it to be awesome.
Thermal Base Layer
On a two week big bike PNW trip in August, I took a prototype of the new zip off thermals. It was mostly warm so I only needed them a few days in the mountains when it rained. I loved the zip on/off feature. I wasn’t as crazy about the fabric choice, which was a little rough on the skin and not all that warm. I also wasn’t so crazy about the waist closure, which was pretty bulky and noticeable, especially when I wore them to bed.

This is the waist closure in the fist prototype.

Now we have a new sample in house made from Nuyarn, which we like much better. Nuyarn is made from merino wool fibers wrapped around a nylon core, combining the best characteristics of each. It’s warmer, stronger, and faster drying than normal merino, plus it’s comfy as hell. It’s also expensive, which is why you only see it in very high end garments.


We have a few different prototypes of a quarter-zip thermal top, also made from Nuyarn. It’s an insulating base layer with a removable, helmet-compatible hood, to which we also added a pass-through hand pocket, so it doubles as a hoody around the campfire. We also experimented with the built-in face covering in the pics below, but later scrapped that.

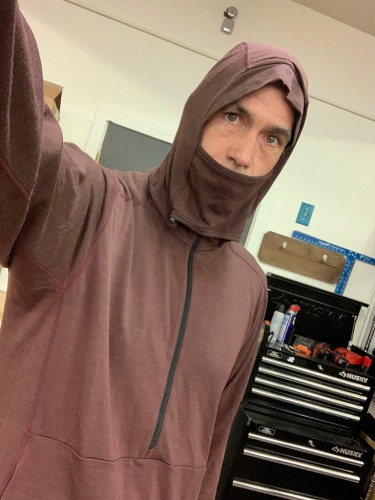

Here it is in a version without the face covering.

The hood fits great under a helmet for cold weather riding. BTW we’re adding an inch of length on the front so it fits a little longer, essentially the same length as the red shirt poking out underneath in this pic.

The hoodie packs down small. Not tiny, but small.

If you want, you can combine the zip off thermals and hoodie into the hoodie’s hand pocket to make a pillow. That is if you’re not already wearing them inside your sleeping bag.


Ultra Thin Base Layer
We’ve settled on materials for our new base layer. It uses graphene thread on the front – which if you want to geek out, conducts and disperses heat from one part of the body to another – and a fine-but-tough mesh on the back. It packs tiny and quick-dries overnight, so you can bring two on a trip and wash-one-wear-one in a river or hotel sink.


Quick Turn Jerseys
We have two new jerseys in progress. The first is a collection of different sublimated designs, which we’ve been referring to internally as the ‘quick turn’ jerseys. The names for these jersey designs will be based on their graphics and not on their materials/shape. With sublimated printing, if we order 500 different jerseys, we can split it over as many prints as we want. We could make 500 different prints if we wanted to. They’re also printed and sewn here in the US, so the MOQs are low and lead times are short. We can switch designs anytime we want. The jersey itself is made from a stretchy mesh. It’s very comfortable for hot weather riding either over or under armor.


These two designs (the orange/black and the retro) were designed in partnership with our friends at Upshift Online.


The Workhorse Jersey
The second jersey is called the ‘Workhorse.’ This is a jersey we designed specifically for travel. We used a heavier material, partly so it works as an outer layer in a wide array of temps (i.e. you don’t have to pull on a jacket below 80), and also so we could make it more abrasion resistant.
The result is a very nice feeling garment. The touch and feel is awesome. I wore a prototype for two weeks on my 1290 this summer and I loved it. On a bigger bike traveling a faster speeds (sometimes on pavement), I felt a more comfortable with a jersey made from a tougher material. I thought I would be hot, but actually I wasn’t because of the higher speeds. Of course a jersey will never replace a jacket for abrasion resistance, we just want it to be tougher than a standard jersey.
The black material around my forearms and elbows in the pic below, and the pink material in version Scottie is holding below, is really tough stuff. In Wyoming I had a slow speed get-off on an abrasive hardpack surface and landed directly on my forearm. The black material wasn’t even scuffed.


We made another version with even more protection on the arms and across the back. You can see it in the pic below, where the grey material comes all the way up to the neck. We may have gone a little too far with this version though, it’s starting to feel almost jacket-like. I think I liked the earlier version better.

The Rak Jacket & Overpant
We released the Rak pullover and overpant back in June. I used it on my two week PNW trip, and also in Death Valley, although it never came off the bike in the desert. Ash has been using it all summer as well.
I really dig this kit. It’s a tough, simple rain layer that absolutely will not allow water in no matter what you throw at it. We added as few features and pockets as we possibly could. There’s nothing on it to fail or leak. It has only 5 zippers on the whole jacket: only two of them access the interior, and only one of them is on the front. I don’t honestly expect the Rak to ever match the Basilisk in terms of sales (although who knows) but for riders who want the maximum in wind and water protection, in a package that packs small and is tough enough to survive a solid hit, this is a great choice. I’ve been reaching for it a lot.


Here’s how I pack it on my 1290. The jacket goes on the MOLLE panel on top of the beavertail, and the overpant goes under.


We made videos for the Rak this week. Check them out here:
Backcountry 35 Buckles
We’ve seen some of the new front buckles on the Backcountry v2.0 snap (left hand, viewer right, in the pic below). We started using the current molded aluminum buckle last year, replacing the stamped aluminum buckle we used before, because the webbing slides through it much more easily, which is important on a compression strap. The old buckles were a common complaint. However the new buckle doesn’t have the same breaking strength as the old one. We asked our factory to make a steel version (right hand, viewer left in the pic below) which is burly as hell. Much heavier of course, but so burly.


Andrew tested the breaking strength of the steel buckles at 230 lbs, more than double the aluminum version (which tested at 110 lbs). We’re a little concerned that the stronger buckle will just transfer the force to the seam – which is harder to repair or replace in the field – so that’s something we’ll have to account for.


Ash experienced a broken buckle in Idaho this summer. Just before the incident in the pic below, on the way to Burnt Knob, she caught the bag on a rock on the uphill side of the trail while riding. It didn’t feel like much at the time, but it resulted in a broken buckle and torn seam. This is the exact scenario we’ve seen on some of the repairs this summer.


The issue is partly the buckle, but also partly the fact that on v2.0 the leading edge of the beavertail is more exposed more than on v1.0, making it easier to snag on things like rocks or branches. In the pic below, you can see that on v1.0 (the clean pannier on the left, look where the pencil is pointing) the beavertail seam goes up higher on the side of the bag, whereas on v2 it is stops lower. The lower seam leaves more of the beavertail edge exposed for catching things. Also v1.0 has more taper at the front edge than v2.0. That’s got to be part of the issue.

Another difference is that on v1.0, the buckle attaches closer to the edge of the beavertail (see pic below, v1.0), leaving less overhang to catch stuff. This would be a relatively simple thing to fix.

So there are a few different things we can play with. It will probably take a little time to implement the changes, as we have bags in production now, and anything that affects the patterning requires at least one full exchange of samples with the factory, which doesn’t happen overnight.
Another possibility we’re looking at – as either a short or long term fix – is to create some kind of brush guard for the beavertail, to protect the entire leading edge. It might be a little bit of a clunky solution, but it would also provide better protection than simply changing the seam.
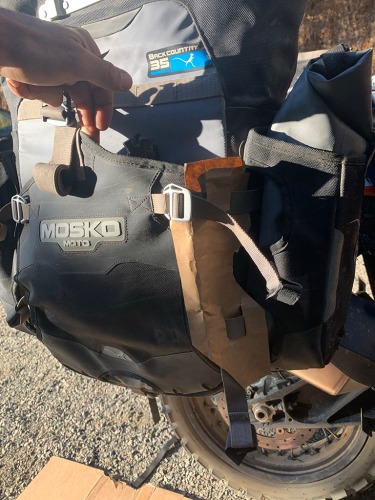

As with anything on our gear: if you experience a broken buckle or torn seam like the pics above please contact us. We will take care of it.
Gnome Tank Bag
We’ve been doing a lot of testing on the new Gnome tank bag, which is essentially a half-sized version of the Nomax. It fits much better on smaller bikes and aftermarket fuel tanks, while also fitting larger bikes as well. Like the Nomax, it also has a 2L hydration reservoir, which is oriented horizontally instead of vertically.

This is what it looks like on my 1290.

Instead of metal cam buckles, we’re moving all the tank bags to these simple gated ladderlocks. They’re a lot less bulky than the cam buckles, so they won’t poke into your knees. This is something we’ve had several requests for.


The Gnome fits great on the Acerbis 3.9 gallon tank on my KTM 500, which is sort of a weird-shape. The only problem is with the gas vent tube. Vents are always a problem with tank bags on enduros.

With this prototype, to make it work in Death Valley, I cut a hole in the bottom of the bag and ran the vent tube through the bag, under the hydration reservoir, and out the zipper. Maybe that’s a solution that we could build into the design. What we really need for this and for all our bags is a hard, universal fit, 90 degree elbow that comes off the fuel cap. We’ve tried unsuccessfully to find or make something like that in the past. Maybe we could make a tunnel for the vent tube out of hard foam. Has anybody come up with a fix for this issue on their own bike?


Another thing to sort out on the Gnome is the internal organization. At the moment it’s just a big open compartment, where things get all jumbled up. It would be nice to keep things separate. However it’s a very small space to work with.

We’re considering something like the accordion compartments on this Peak Designs camera accessory bag.
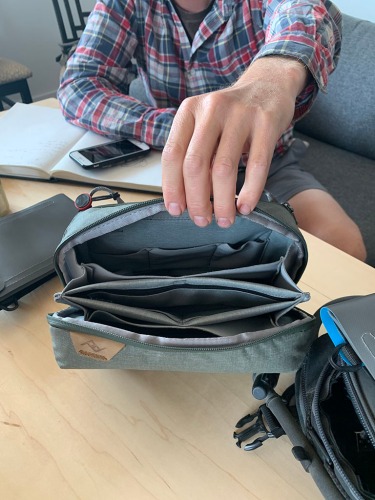
Off the bike, the Gnome turns into a hip sack or shoulder bag.

Europe ’20 (by Roel)
Roel sent the following pics and stories from Europe for the blog. These are his words, even though he refers to himself in the third person  Roel: keep up the great work over there man!! We miss you!!
Mosko Meetup Barcelona with OM at Restaurant Grau. Jordi (@JotXtrail), who helped with the organization also guided an off road ride out. Even though it rained all day we had a great meetup.


The next weekend we were in Italy for the HARD ALPY TOUR from Sanremo to Sestriere. Silke and Alex came over to help out and support the riders. We set up in Sanremo on Friday and broke down Saturday afternoon to move everything to Sestriere and set up again for the finish. There were quite a few Mosko Riders out there already so we created a Mosko Rider Hang Out area. Roel adjusted a set of Panniers for a Mom, Dad, Son team so they could go on both the new Speed Pin Wedge and the old Latch Wedge and they could change panniers between the 3 of them. Jasper arrived later on Sunday, coming back from a scouting mission with Nick at the French Barcelonette Adventure Moto event in the Alps.
We will definitely be there next year! Thanks for the first ever Mosko Fashion show on the Mosko Van Catwalk Jasper! Love your style!


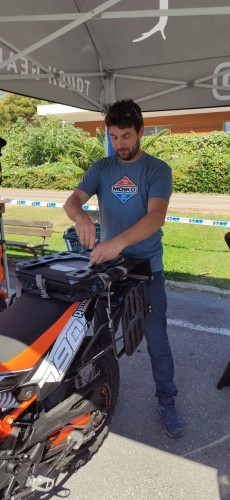


We were hoping to get on the road early to get on the way to the next event in Sweden about 1200 Miles away but somehow we always end up leaving last. This time both Jasper and Roel were fixing bikes for riders that had some issues after the 3 day off road battle.


In the same weekend as the HAT, Team UK represented at The Overland Event near Oxford where hundreds of adventure riders came together to get inspired and exchange travel stories. @HP2MAV, @sabrina.advrider and John, You guys rock!

Jasper and Roel continued to Sweden for SKOG. The guys and girls at Basecamp North put together this kick ass event in the Swedish forest and we tried to contribute from afar. We had a blast on the trails and at the campsite where Naturkok Sander Blohm cooked up a feast every day. This event will be back bigger and better next year! Thanks Morten Bibow for involving us with SKOG. This is what adventure riding is all about!


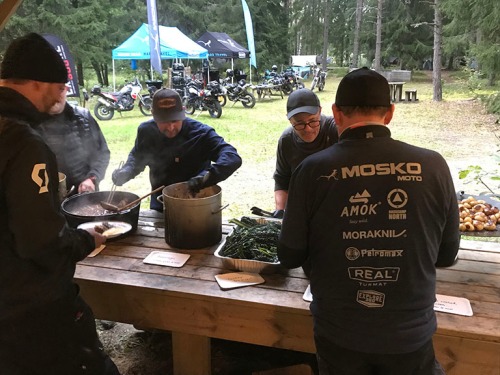


The road trip continued South with a Mosko Meetup in Germany at Villa Löwenherz with Outback Motortek and Bikes Peak, the German importer for Outback Motortek and a multitude of other adventure related brands.
After filling up with German culture we moved back to The Netherlands where we organized a Meetup/Ride Out with Albert from Adventure Shield. Albert organized a tour through the beautiful province of Drenthe. Though the weather was typically Dutch with lots of rain we had plenty of riders come out and see us. Most of them left covered in mud.
A big shout out to Wab who somehow always makes it to every event in the Netherlands to lift our spirits with some specialty beers. The Mosko Blue cans were well picked my friend! Albert created this Moveo Neck Brace for Roel. Very thoughtful. Thanks for keeping him safe in Europe!
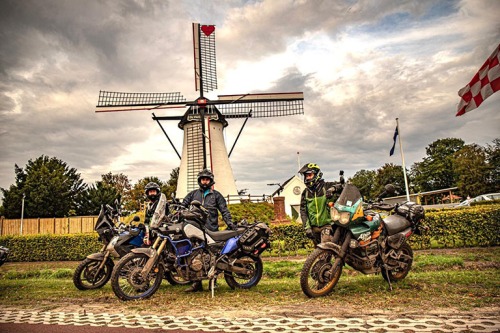


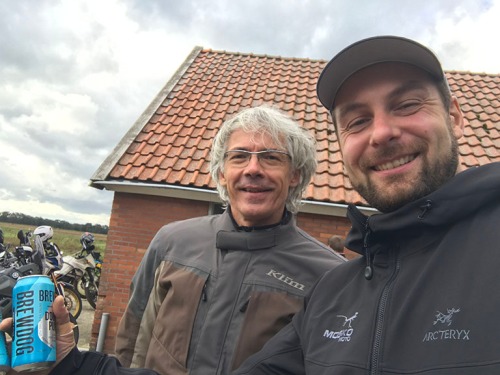


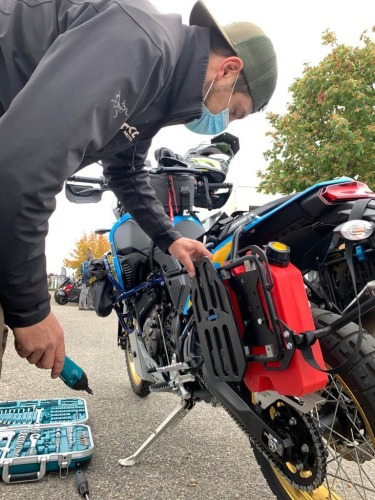
With Winter around the corner, Roel moved South again after checking in the new inventory at our European warehouse in Amsterdam. Thanks for helping out Bob and Jasper! On his way to Spain Roel stopped in Lyon, France to show our gear. With Covid numbers going up in Europe a Mosko Meetup did not seem the best idea. Roel and Silke came up with the Mosko Ride Thru. Ride up, check out the “menu” and score a great deal on your gear. Although we prefer the personal contact and showing all the gear this was a good way to keep both riders and the team safe. Together with Lorry from Outback Motortek Roel had a good time at Honda Lyon and got this rider all set up for his ride to Mongolia next year on his Mosko Blue Yamaha T700 Rally. Have a great ride! Thanks for hosting us Honda Lyon and to everyone who came out!




Thanks for the update Roel! I really love the ‘ride-thru’ event idea. If COVID is still raging in the spring, I could easily see us doing a ride-thru meetup tour here in the states. I feel like maybe we should create a new blog just for Europe.
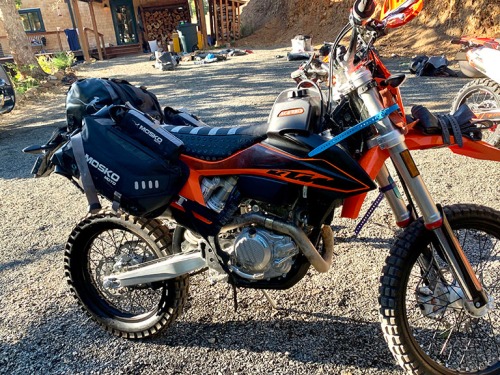
Reckless 80 v3.0 on the KTM 500 EXC-F
I recently picked up a KTM 500 EXC-f to use as my primary enduro-touring bike. The team trip to Death Valley, which we just returned from, was its first trip.
To mount the Reckless 80 v3 Revolver on the 500, I initially set it to the fully forward ‘3’ position on the legs. In that position it was still too loose, because the harness is sized for a larger bike. I decided to melt my own holes to make it thinner. We intentionally designed the new harness with lots of extra space for that reason. On smaller bikes without a rear luggage plate, please consider this mod. It’s very easy to make the harness narrower, and increase the forward lean of the legs.
- First place the harness on the bike and mark the desired position with a pen. You can install one bolt on each leg to hold the harness together if needed.
- Once the holes are marked, melt them with a soldering iron. After melting, clean them up with a drill.


This mod does not void your warranty. On a smaller bike you will have fewer damages and less wear with custom holes. The bag will be far more stable while riding.
This is what mine looked like when I was done. I melted two sets of holes before I was satisfied with the fit. Ultimately this bike will have a rear rack, but for now this setup worked great.
Mike Spurgin at Taco Moto in Las Vegas was nice enough to let us park our trucks and trailers at his house for the Death Valley trip. He also did some work on our bikes the night before we left, and we left our bikes with him after the trip as well. He’s building up my 500 into a mini adventure bike.

Ash wanted to mount this Cyclops Explorer dirt bike light on the Adventure Spec Mini Fairing on her Honda 450L. We needed a spacer that we didn’t have. Mike said ‘no problem, we’ll print one for you tonight.’ His neighbors – also his shop helpers, aka the Space Camp Boy Scout Kids, aka Kaden Hickman and Brady Benson (both age 14) – have a 3D printer. By the next morning, they’d made a custom bracket for the trip. Thanks guys! Wish I knew how to do that.


Mike: THANK YOU!! You’re the man. So stoked for this build.
Cruz Tool Kit
I finally got around to doing a tool-by-tool swap from what was in my long standing personal tool roll, vs the Cruz kit we created for our site. I was stoked to find that, aside from a few bike-specific OEM wrenches, everything swapped seamlessly.
Here’s the Cruz kit.

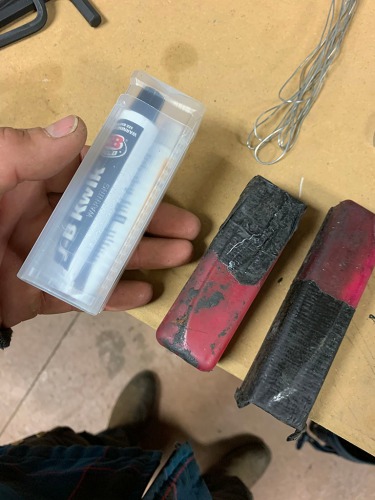
Here’s my old kit (I had just recently moved into a prototype of the Fatty).

I love the plastic JB Weld holder that Ames sourced for the kit. Much better than my old toothbrush travel case holder. Without some kind of case, the tubes inevitably split or wear through in my bags.
I dig the Cruz T-handle a lot. It rolls up much better than the KTM ones.

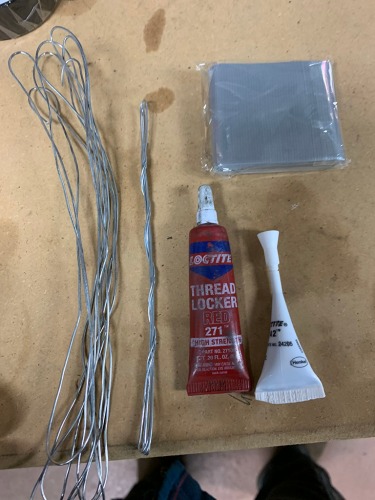
What a cute little mini ratchet. I’m sure this will come in handy.


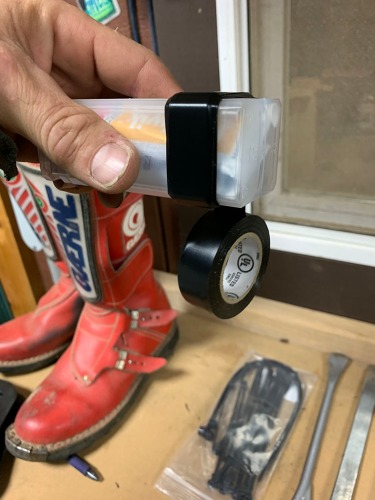
This is how we store the tape, rather than taking the entire roll.
Mosko Team Ride
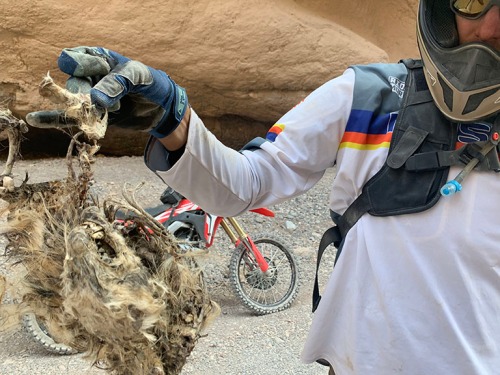
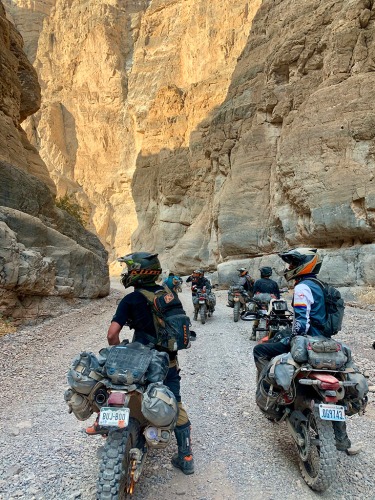
A few weeks ago we closed the shop for a week and headed to Death Valley with (almost) the entire team to ride. 13 of us made it out for this trip: Roel’s in Europe and he couldn’t travel due to COVID, Scottie and Julia were busy with our 2021 apparel PO, and Lee is still recovering from a broken tib/fib. The rest of us flew to Las Vegas, except for JC and Ames who drove down with the trucks and trailers.
This was by far the biggest group we’ve ever had on a Mosko team trip. Up till a few years ago there were only 4-5 of us. I think the most we’ve ever had before this was 8 riders. 13 seemed nuts. We had such a wide variety of bikes (250cc to 1200cc) and skill levels, I was wondering how – or if? – it was all going to work.
As it turned out, everything went great. This was one of my favorite team trips yet.
Everyone split into smaller groups during the day, doing their own thing and meeting up at night. Somehow we all managed to find each other every night but two, which is impressive considering that we didn’t always know where we’d camp or who would be the first to arrive. I would ride with this crew any day, even if we didn’t all work together. It didn’t feel like a ‘work’ trip, just friends going riding.






Other Stuff
I found (thanks to Google) this cool way to reduce the noise of a sleeping pad at night. It really works! You can put one shirt at each end.

Voile straps make shoes smaller.
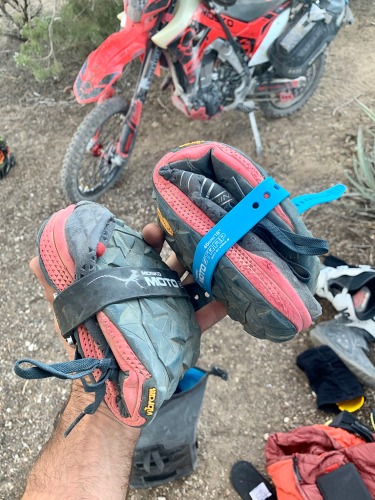
They also attach tubes and fuel bottles to the R80 harness.


they also hold the Fatty on pannier racks on the exhaust side.

I found this neat packable fishing rod online, made by Emmrod in Coeur d’Alene, Idaho. It splits in half and packs tiny. You could crash your bike all day long and not break it. It casts pretty well too, at least in my driveway. Stoked to give it a try on the water next season.

Our neighbor in White Salmon, Rich, who is a metal artist, stopped by the shop last week and surprised us with this awesome Mosko lizard, complete with handlebars, shift/brake levers, goggles, and panniers. It’s about 3′ long. So cool!!


For a while there, between COVID and all the wildfire smoke, it seemed like the apocalypse was actually happening this summer. This is the view from the Hood River bridge, crossing the Columbia River.

Lee, who is recovering from a broken tib/fib, bought this salvaged-title Vespa and immediately put knobbies on it. It’s his ‘recovery bike.’ When we first met Lee, he was riding a salvaged Ninja with knobbies. Lee will put knobbies on anything.

We’ve had a great summer at the Bates Mototel (our free backyard moto traveler campground). It’s still open, and even though it’s getting cold out now and we had to shut off the water and shower due to freezing temps, we still have some folks coming through. Its still open for now, but at some point soon we’ll have to roll up the tent and pack it away until spring. The Mototel has been so much fun this summer.
In the meantime, if you need a spot to stay in the Gorge, find the Bates Mototel (White Salmon, WA) on Tent Space on advrider.com.


We built this crazy thing, called the “Automan,” and took it to the desert for a week of sun, dust, wind, bikes, and friends.


Overall it has been a hell of a summer. Work was busy, with lots of new and updated products and a growing team, plus lots of riding. Considering how things looked at the start, I’m so thankful for how it turned out. Now winter is coming. We’re hoping to get a few more riding days before it arrives, and we’re also hatching plans for a mid-winter desert escape. Until then, here’s a few more pics from summer.


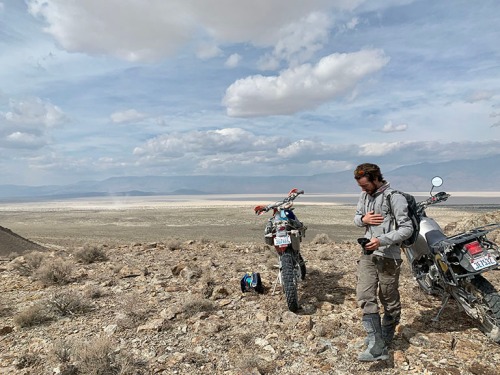


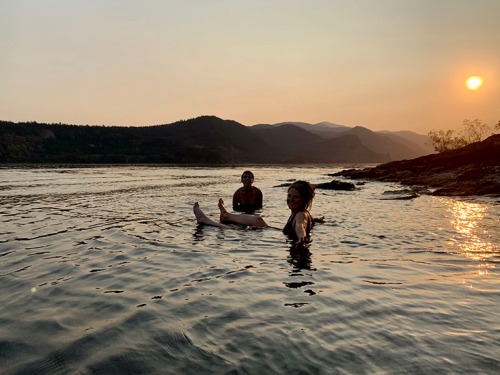

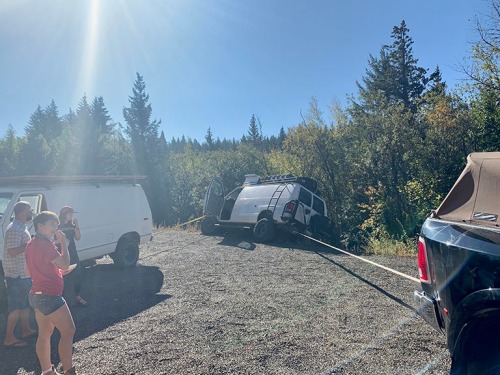


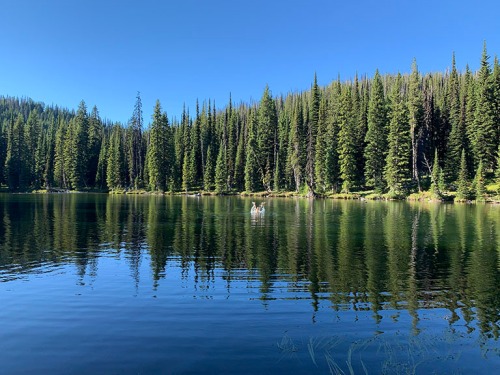
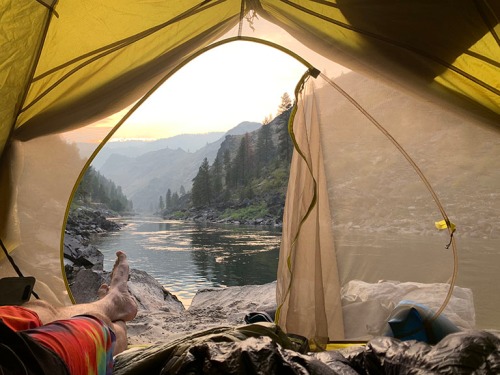

I’ll just leave this here.

Leave a comment
Comments will be approved before showing up.
Warranty and Crash Replacement
We never cut corners during development or manufacturing, so we stand behind our products. If one fails due to a problem with materials or workmanship, we’ll make it right.
Your are successfully subscribed for email notifications.
Notify me when available
We will send you a notification as soon as this product is available again.
Your email is required
We don't share your email with anybody
x

